In 2022 I joined nearly 200 random strangers and took on the Hiker Challenge. The goal: complete the 343 mile Sheltowee Trace trail through Kentucky and into northern Tennessee within one year. More on that in another post.
Being frugal and having some dietary issues I opted to dehydrate all of meals for the weekend backpacking trips. Or at least avoid purchasing the more expensive freeze dried meals available at local outfitters and online. Admittedly I do like the premade meals but the cost was going to add up quick over all the trips ahead.
I also try to eat vegetarian for about 80% of my meals mostly due to some health and dietary restrictions. I knew being able to prepare my own meals would be a plus.
Here’s What I Learned
Supplies
I already owed a dehydrator so there was no additional cost. I was lucky to find a nice one on sale years ago. Really, any dehydrator will do just opt for one that can adjust the temperature. They’re easy to find used.
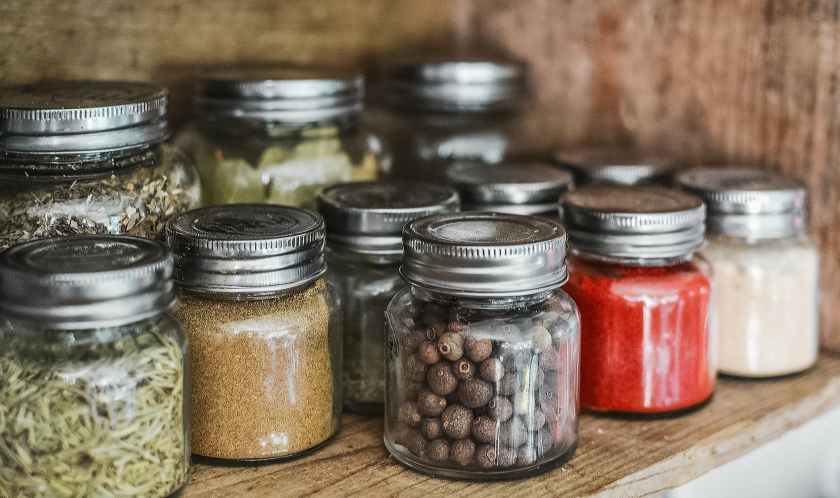
I store the dehydrated foods in mason jars till I’m ready to use. Again, I had plenty on hand. Optionally, I added oxygen and moisture absorbers to increase shelf life.
Lastly, I started vacuum sealing the mason jars to remove any air. I use dehydrated ingredients on a regular basis at home to add to soups and other recipes so I wanted something nicer to have on hand. You can find kits online. I tried a few different options and will revisit in another post.
Ziplock bags work well too but not sure how air tight they are over the long term.
Meals vs Ingredients
The strategy I found that worked best for me was to dehydrate ingredients vs meals. This allows for greater flexibility and seasonings in smaller batches. Generally, easier to process and therefore could dehydrate more foods. (See below). Plus it allowed for more variety and experimentation throughout the year; I don’t think I had the same meal twice.
I did dehydrate a couple complete meals but I found that a bit more challenging than dehydrating ingredients and assembling later.
You had to prepare the meal which could take considerable time and effort depending on the meal. Of course, that meant several servings of that meal which eliminated choices down the road.
Meals had to be dehydrated at the highest heat of any one ingredient. For example, I prepared a turkey chili and the batch had to be dehydrated at a higher temperature to ensure the turkey was safe. But, the higher temp meant that the veggies lost more of their nutritional value.
In fairness some meals really require the ingredients to be cooked together. I don’t think a deconstructed chili would taste nearly as good as one that simmered all day on the stove or crockpot.
Nutritional Info
Note: I’m not a food scientist and I recommend following your manufacturer’s instructions. For me, I’ve dehydrated fruits and veggies alone at a lower temp in an attempt to retain more nutrients. I start at 135 for the first hour, then lower to 115 till done per Excalibur. I rotate the trays once or twice if possible.
The low temp method does not apply to meats or anything containing any animal products. I’ve done jerky several times and always kept it at the higher heat.
In terms of nutritional value/serving I’ll weigh the foods before and after. Then simply divide per serving to have the nutritional info per ounce/gram for the dehydrated foods.
For fresh fruit I averaged how many slices per fruit.
Fruit rollups? Good luck.
Foods by preparation
I knew I wouldn’t be consistent with this if it took a lot of time and effort. So, I found a few hacks to make dehydrating ingredients faster and easier.
Fresh
In general, fresh required prep before dehydrating and was my least favorite option. Fresh fruits & veggies usually require additional chopping and/or blanching. A good mandoline is your friend.
Some foods I do regularly dehydrate from fresh:
- Kale chipes
- Apple chips
- Pear chips
- Kiwi chips
- Fruit rollups
- Sliced mushrooms
- Sliced lemons
- Sliced limes
- Sliced oranges
- Chopped green onions
- Halved cherry tomatoes
Frozen
Frozen is one of my favorite options. I can buy in bulk when on sale and stock up. With a few exceptions, there’s usually no additional processing. At most let them thaw before putting on the trays.
- Chopped spinach
- Peas
- Chopped okra
- Chopped onion
- Chopped peppers
- Diced carrots
- Blueberries
- Raspberries, blackberries, etc are better blended and added to smoothies, fruit rollups, etc.
- Salmon jerky (It’s an acquired taste but great if you like fish)
Canned
Some foods just tasted and rehydrated better from canned. Simply drain and rinse well before dehydrating.
- Chicken (love these from my local Costco).
- Beans (black, kidney, chili, pinto)
- Corn (I think it rehydrates better than frozen)
- Chopped/diced tomatoes
- Pineapple slices
Packaged
Then there’s the miscellaneous packed foods that do well in the dehydrator.
- Hummus
- Fat Free Greek Yogurt (not a long shelf life being dairy. Use soon or store in the freezer.)
- Pasta (cook about 3/4 of the way done then blanch immediately). I like the Banza brand for added protein.
- Quinoa
- Rice
There’s a ton of instant/dried foods options available that don’t require dehydrating or any prep that can be added to meals:
- Ramen noodles
- Instant mashed potatoes
- Powdered milk (great for the instant mashed potatoes or oatmeal)
- Couscous
- Oats (I prefer to overnight soak rolled oats vs packets of instant)
- TVP (Textured Vegetable Protein)
- Soy Curls
No 10 can for ingredients you can’t easily/safely make at home. Or whenever they go on sale.
Sample Recipes
Now that I have a set of ingredients to choose from I can start to assemble meals. I found that 2 total cups dehydrated ingredients was one pretty filling serving after a day on the trail. I’m not including measurements of the ingredients as your nutritional requirements and tastes will vary.
Overnight oats
- Rolled oats
- Powdered milk
- Protein powder (one scoop vanilla and one scoop chocolate)
- Peanut butter powder
- Chia seeds
- Blueberries
Ramen Noodles
- One package Ramen. Top Ramen in inexpensive and readily available but I like Lotus Rice Ramen as a healthier alternative.
- Spinach
- Mushrooms
- Protein (chicken, TVP, Soy Curls, etc)
- Peas
- Green onions
- Seasoning (Hot chili oil packets, soy sauce packets from local takeout, premade seasoning packets).
Mashed Potatoes Surprise
- 1/2 cup (ish) instant mashed potatoes mixed with a tablespoon or 2 of dehydrated milk.
- Assorted veggies
- Protein(s) of choice
- Cut up cheese (I usually hike with a block of hard cheese or Baby Bells come in assorted flavors that keep well. I prefer the sharp cheddar. String cheese does well except in the heat).
- A small bottle of olive oil or similar to add to the mashed potatoes instead of butter.
Tip: Keep the mashed potatoes in a separate bag and mix in at the end. They absorb water quickly making it harder to rehydrate the other ingredients.
Chicken tacos
- Rice
- Chicken (or protein of choice)
- Veggies of choice (peppers, onions, tomatoes)
- Hot sauce packet
- Taco seasoning mix
- Cheese (see above)
- Fat free Greek Yogurt in lieu of sour cream
- Wrap in a tortilla or eat straight out of the pot
I hope this gives you some ideas on how to conquer dehydrating backpacking meals. Check back as I’ll be adding more recipes in the future. And be on the lookout on how I stored and prepared the meals on trail.

One comment